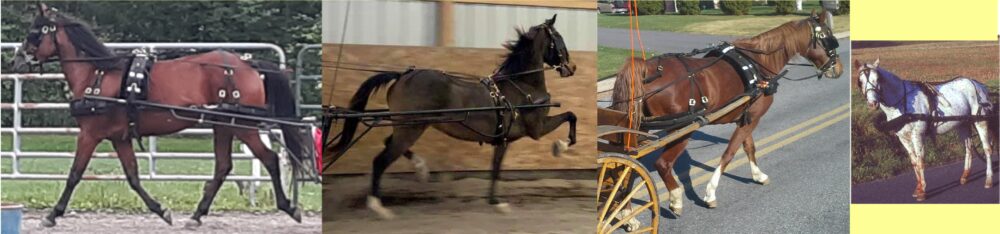
(If you missed the NACMO page, please go back and read about the sport) As a Ride Manager, you must make yourself familiar with the NACMO ride rules. It is very helpful for new managers to print out this page and keep it handy at all times. If there are any disputes by riders during the rides, having a printed copy of rules is very helpful.
Every ride offers a 5 to 10 objective station Long Course setup, covering a range of 12 to 20 mile course AND a 3 to 5 objective station Short Course setup, covering a maximum of 6 mile course. This gives attendees the option to run a long distance or a short distance. Both distances offer National Points and Standings (see the website www,nacmo.org for more info)
When a contestant/team enters the ride, they must choose between Long Course and Short Course for the day. On a multiday ride, a contestant/team may choose to ride Long Course one day and Short Course one day! This keeps things interesting and allows a team to won awards in both courses for year end.
We have many riders with older horses, or horses with older riders, that would like to join in the fun of NACMO, but they are daunted by the Long Course. The Short Course gives them the ability to have fun with us without killing the horse or rider!
Once you choose your trail system, carefully review it for the ability to setup a shorter ride of 4 to 6 miles as well as a longer course of 12 to 20 miles. Then contact the park management for permit applications. When applying for a permit, ask your regional director to assist you with any questions. NACMO is a non-profit organization and provides a national coverage insurance policy, specifically for these events.
The Short Course should be modified from the Long Course, unless terrain doesn’t allow for the mileage to be under the maximum allowed. (EXAMPLE OF MAPS BELOW)
.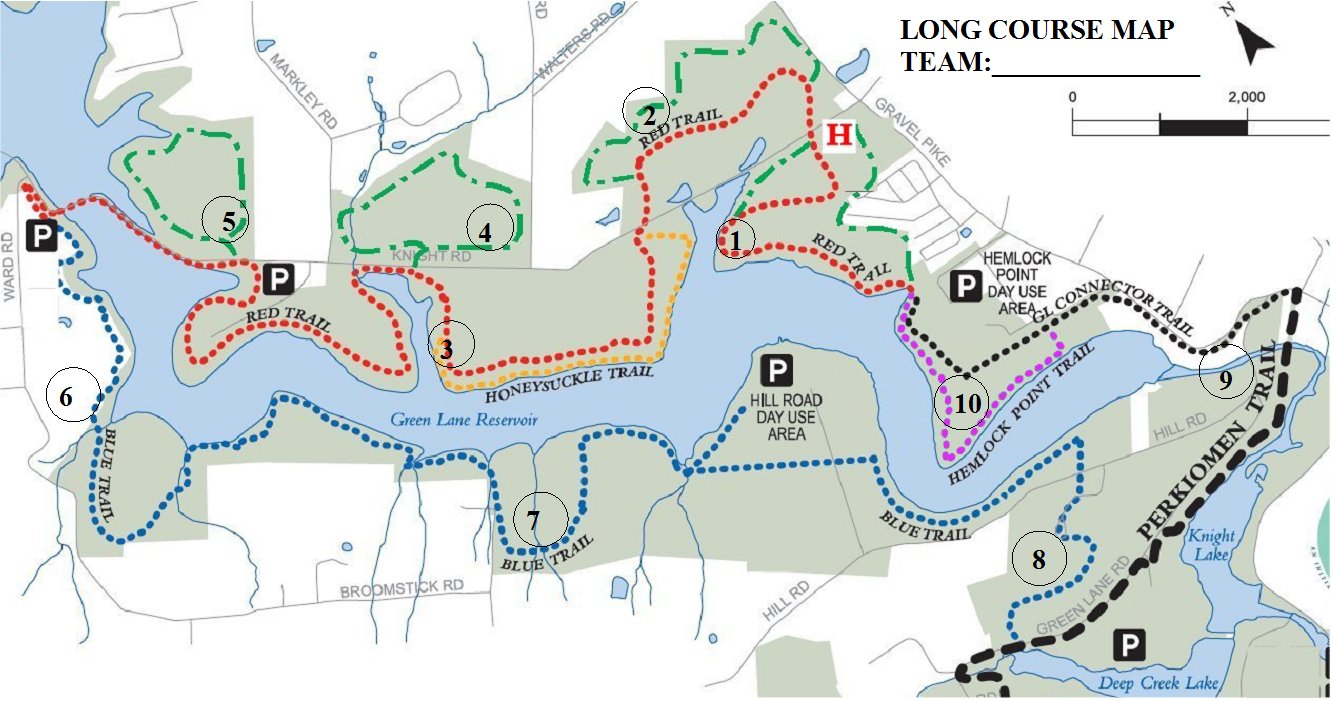
.Clues for the courses are printed on the back of the maps. Only print those clues as relate to the map. Long Course would have clues 1 through 10. Short Course would have clues 1, 2, 9, 10.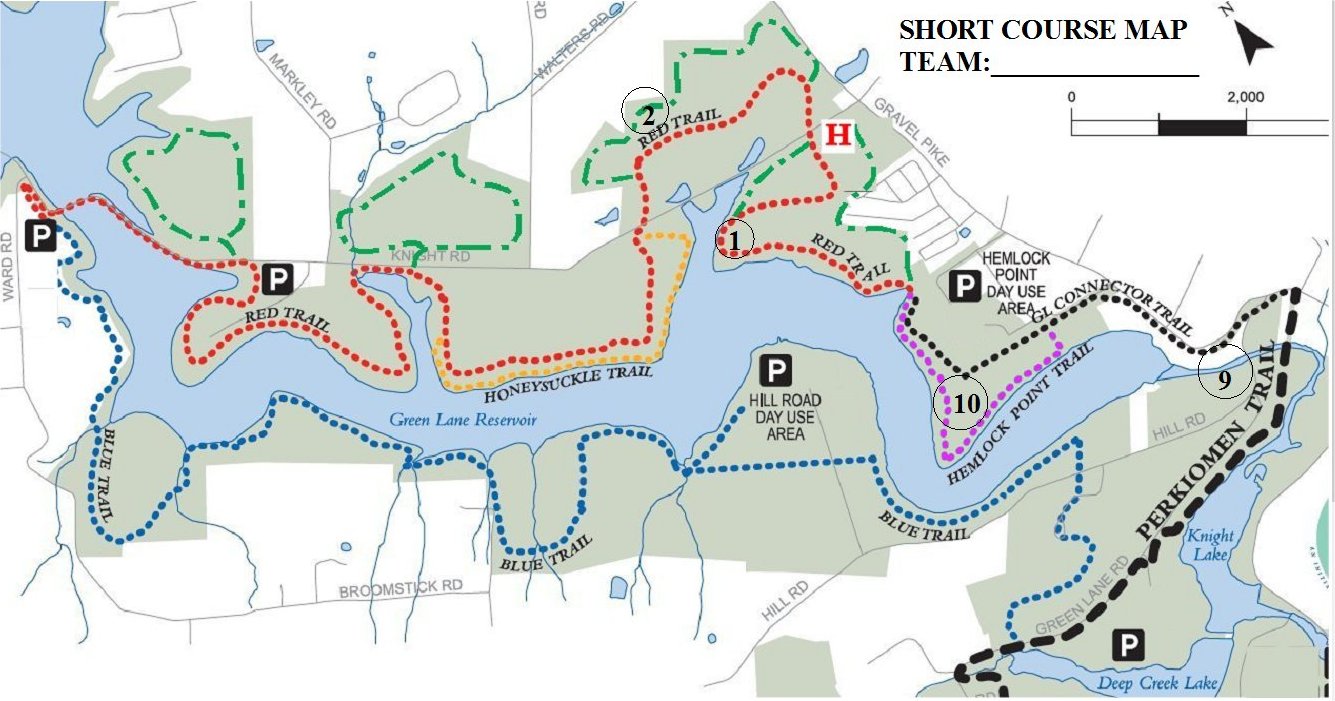
Scoring Long Course:
- 10 plates = 1 point per plate (10 points)
- 7 plates = 2 points for 3 plates, 1 point for 4 plates (10 points) designate points on the clue list side of the map
- 5 plates = 2 points per plate
- 6 placings (First = 6 points, down to Sixth = 1 point)
Scoring Short Course:
- 5 plates = 1 point per plate
- 4 plates = 2 points on 1 plate and 1 point on 4 plates (designated on the clue list)
- 3 plates = 2 points on 2 plates and 1 point on 1 plate (designated on the clue list)
- 3 placings (First = 3 points, down to Third = 1 point)
EXAMPLE SHORT COURSE WITH FOUR OBJECTIVE STATIONS
 What about setting up your objectives and taking readings? Here’s some tips from experienced ride managers.
RULE: M5a … Objective Stations must be placed where they can be read from horseback.
This can be challenging for first time ride managers. Keep in mind that you can put your clues very far apart (up to 3/4 of a mile!!!) which can really make finding an objective station challenging.
If you are setting up alone, use an orange or yellow shirt to mark your objective station so as you travel around setting clues, your compass readings will be easy to do as the orange or yellow shirt will stand out. (Remember to remove your shirt once your compass settings are documented – chuckle)
Use natural clues, but keep in mind that “manure happens” and that tree stump that you used as a clue could be knocked down by a hiker, or the pile of rocks could have been displaced by a mud slide. Many ride manager add an unnatural clue, clipped to a tree or bush, to help prevent loss of natural clues.
Secure the paper plates well! Again, manure happens and it is possible for a woodland creature, or an unsuspecting hiker, to remove your objective! If the weather will be bad, or you are setting up ahead of time, place the paper plate in a ziplock bag to preserve the writing.
Use your imagination when placing an objective … make your riders look up into the branches of trees, or peer through the foliage of a pine tree, or go around the back of a rock formation. And set your clues so that team work will be especially important! This will also make it challenging for the Individual Rider.
And then there is the paperwork that has to be completed (oh heavens)
On the NACMO website, click the link on the left hand menu FOR MEMBERS, then choose the link RIDE MANAGER INFORMATION, to see a long list of scary paperwork. Your regional director will assist you with this paperwork, do not panic.
There are two very helpful links here for the new manager, and for the experienced manager as well. RIDE MANAGERS AID and RIDE MANAGERS HELPER. Both these short pdf files will help you better understand the process and answer most the questions you may have on becoming a new ride manager (or being a better experience ride manager) First and foremost, have fun. it’s all about having fun!